
Temperature measurement is one of the most common measurements in the process industry.
Every temperature measurement loop has a temperature sensor as the first component in the loop. So, it all starts with a temperature sensor. The temperature sensor plays a vital role in the accuracy of the whole temperature measurement loop.
As any measurement instrument you want to be accurate, also the temperature sensor needs to be calibrated regularly. Why would you measure temperature, if you don’t care about the accuracy?
In this blog post, I will take a look at how to calibrate temperature sensors and what are the most common things you should consider when calibrating temperature sensors.
Download this article as free pdf file
Before we get into details, here is a short video on how to calibrate a temperature sensor:
What is a temperature sensor?
Let's start from the basics... discussing what a temperature sensor is:
As the name indicates, a temperature sensor is an instrument that can be used to measure temperature. It has an output signal proportional to the applied temperature. When the temperature of the sensor changes, the output will also change accordingly.
There are various kinds of temperature sensors that have different output signals. Some have a resistance output, some have a voltage signal, some have a digital signal and many more.
In practice, in industrial applications, the signal from temperature sensor is typically connected to a temperature transmitter, that will convert the signal into a format that is easier to transfer for longer distances, to the control system (DCS, SCADA). The standard 4 to 20 mA signal has been used for decades, as a current signal can be transferred longer distances and the current does not change even if there is some resistance along the wires. Nowadays transmitters with digital signals or even wireless signals are being adopted.
Anyhow, to measure temperature, the measuring element that is used is the temperature sensor.
Measuring the temperature sensor output
As most temperature sensors have an electrical output, that output obviously needs to be measured somehow. That being said, you need to have a measurement device to measure the output, resistance or voltage, for example.
The measurement device often displays an electrical quantity (resistance, voltage), not temperature. So it is necessary to know how to convert that electrical signal into a temperature value.
Most standard temperature sensors have international standards that specify how to calculate the electrical/temperature conversion, using a table or a formula. If you have a non-standard sensor, you may need to get that information from the sensor manufacturer.
There are also measuring devices that can display the temperature sensor signal directly as temperature. These devices also measure the electrical signal (resistance, voltage) and have the sensor tables (or polynomials/formulas) programmed inside, so they convert it into temperature. For example, temperature calibrators typically support the most common RTD (resistance temperature detector) and thermocouple (T/C) sensors used in the process industry.
So how to calibrate a temperature sensor?
Before we go into the various things to consider when calibrating a temperature sensor, lets take a look at the general principle.
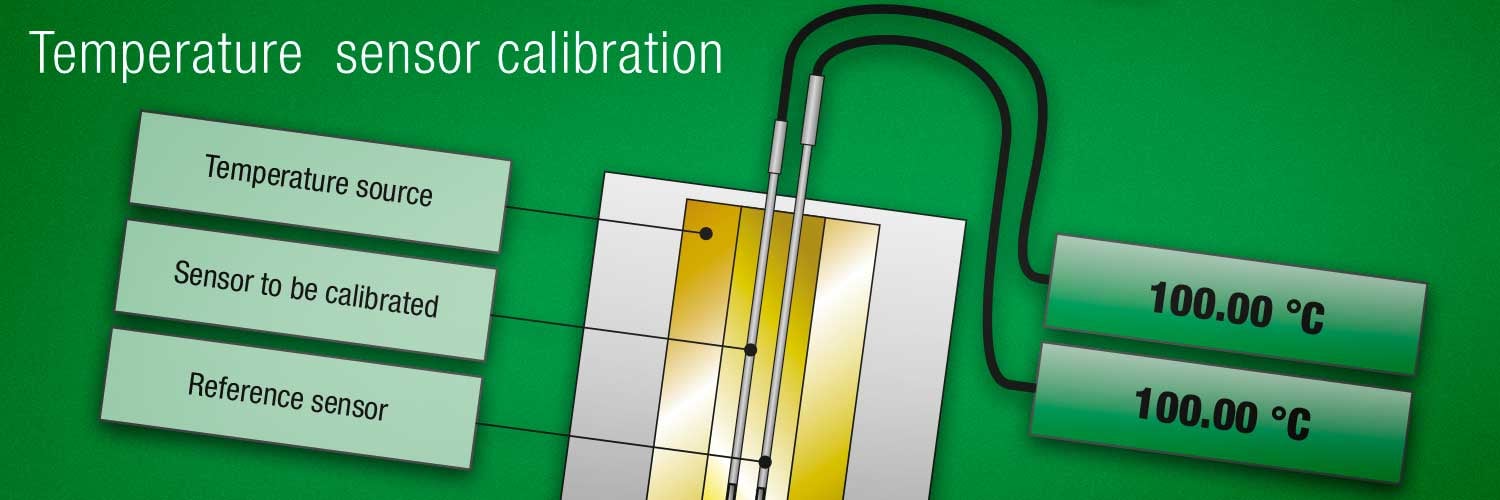
First, since the temperature sensor measures temperature, you will need to have a known temperature to immerse the sensor in to calibrate it. It is not possible to “simulate” temperature, but you must create a real temperature using a temperature source.
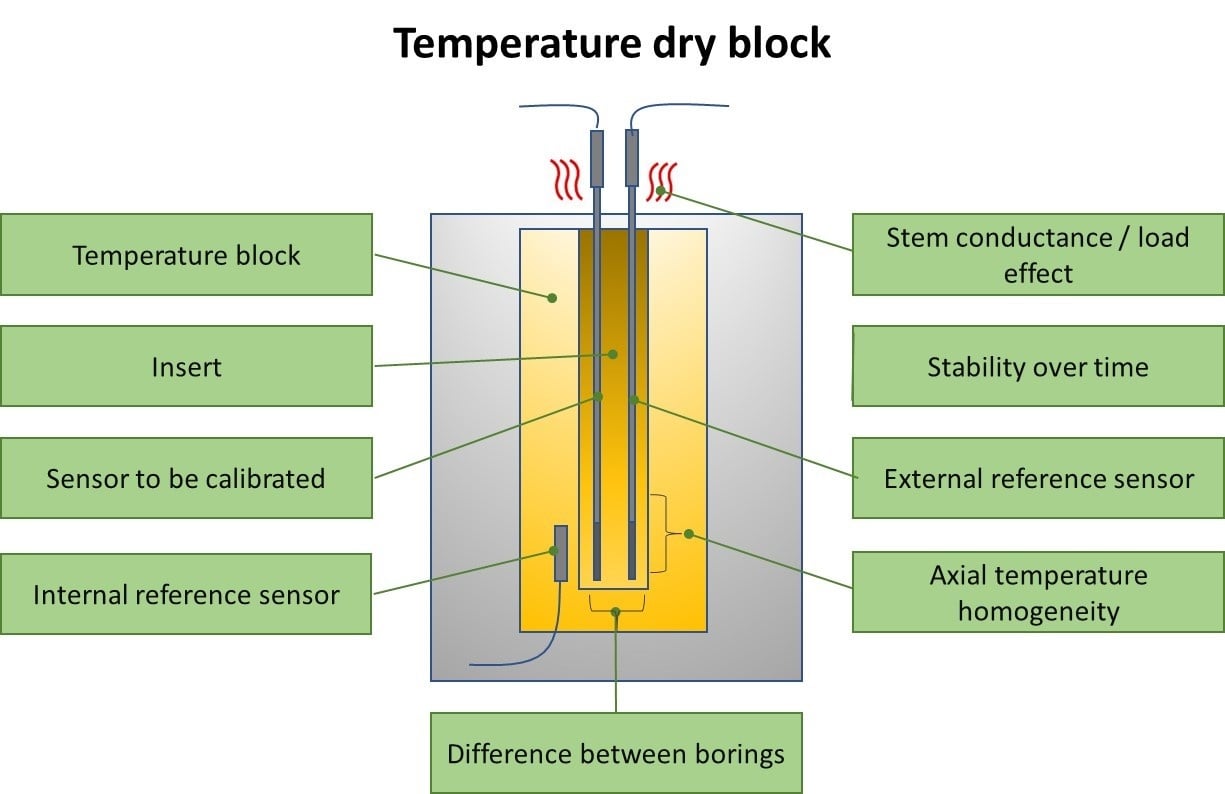
You can either generate an accurate temperature, or you can use a calibrated reference temperature sensor to measure the generated temperature. For example, you may insert the reference sensor and the sensor to be calibrated into a liquid bath (preferably a stirred one) and you can perform calibration at that temperature point. Alternatively, a so called dry-block temperature source can be used.
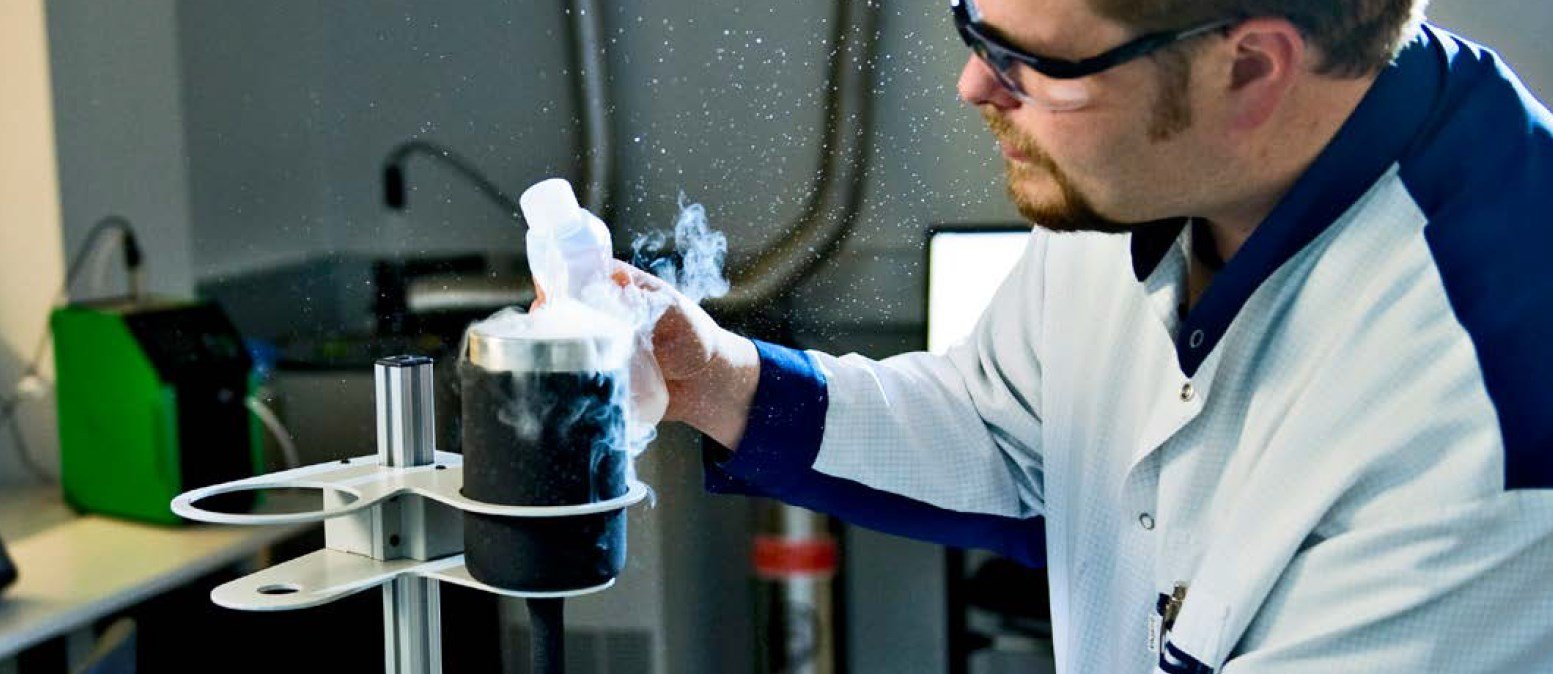
As an example, using a stirred ice-bath provides pretty good accuracy for the 0 °C (32°F) point calibration.
For industrial and professional calibration, typically temperature baths or dry-blocks are used. These can be programmed to heat or cool the temperature into a certain set point.
In some industrial applications, it is a common practice to replace temperature sensors on regular intervals and not to calibrate the sensors regularly.
How to calibrate temperature sensors – things to consider
Lets start digging into the actual calibration of temperature sensors and the different things to consider....
1 - Handling temperature sensor
Different sensors have different mechanical structures and different mechanical robustness.
The most accurate SPRT (standard platinum resistance thermometer) sensors, used as reference sensors in temperature laboratories, are very fragile. Our temperature calibration laboratory people say that if a SPRT touches something so that you can hear any sound, the sensor must be checked before any further use.
Luckily most of the industrial temperature sensors are robust and will survive normal handling. There are some industrial sensors that are made very robust and then can withstand pretty rough handling.
But if you are not sure of the structure of the sensor you should calibrate, it is better to be safe than sorry.
It’s never wrong to handle any sensor as if it was a SPRT.
In addition to mechanical shocks, a very fast change in temperature can be a chock to the sensor and damage it or affect the accuracy.
Thermocouples are typically not as sensitive as RTD probes.
2 - Preparations
There are normally not that many preparations, but there are some things to take into account. First, a visual inspection is performed in order to see that the sensor looks ok and make sure it has not been bent or damaged, and that the wires look ok.
External contamination can be an issue, so it is good to know where the sensor has been used and what kind of media it has been measuring. You may need to clean the sensor before calibration, especially if you plan to use a liquid bath for calibration.
The insulation resistance of an RTD sensor can be measured in prior to calibration. This is to make sure that the sensor is not damaged and the insulation between the sensor and the chassis is high enough. A drop in insulation resistance can cause error in measurements and is a sign of a sensor damage.
3 - Temperature source
As mentioned, you need to have a temperature source to calibrate a temperature sensor. It is just not possible to simulate temperature.
For industrial purposes, a temperature dry-block is most commonly used. It is handy and portable and typically accurate enough.
For higher accuracy needs, a liquid bath can be used. That is anyhow not typically easily portable but can be used in laboratory conditions.
For zero Centigrade point, a stirred ice-bath is often used. It is pretty simple and affordable yet provides a good accuracy for the zero point.
For the most accurate temperatures, fixed-point cells are being used. Those are very accurate, but also very expensive. Those are mostly used in accurate (and accredited) temperature calibration laboratories.
4 - Reference temperature sensor
The temperature is generated with some of the heat sources mentioned in the previous chapter. You obviously need to know with a very high degree of accuracy the temperature of the heat source. Dry-blocks and liquid baths offer an internal reference sensor that measures the temperature. But for more accurate results, you should be using a separate accurate reference temperature sensor that is inserted in the same temperature as the sensor(s) to be calibrated. That kind of reference sensor will more accurately measure the temperature that the sensor to be calibrated is measuring.
Naturally the reference sensor should have a valid traceable calibration. It is easier to send a reference sensor out for calibration than sending the whole temperature source (it is good also to keep in mind the temperature gradient of the temperature block if you always only have the reference sensor calibrated not the block).
As for thermodynamic characteristics, the reference sensor should be as similar as possible compared to the sensor to be calibrated, to ensure they behave the same way during temperature changes.
The reference sensor and sensor to be calibrated should be immersed in the same depth in the temperature source. Typically, all sensors are immersed to the bottom of a dry-block. With very short sensors, it gets more difficult as they will only immerse a limited depth into the temperature source, and you should make sure that your reference sensor is immersed equally deep. In some cases, this requires a dedicated short reference sensor to be used.
Using fixed-point cells, you don’t need any reference sensor, because the temperature is based on physical phenomena and is very accurate by its nature.
5 - Measuring the temperature sensor output signal
Most temperature sensors have an electrical output (resistance or voltage) that needs to be measured and converted to temperature. So, you need to have some device to be used for the measurement. Some temperature sources offer also a measurement channels for the sensors, both device under test (DUT) and reference.
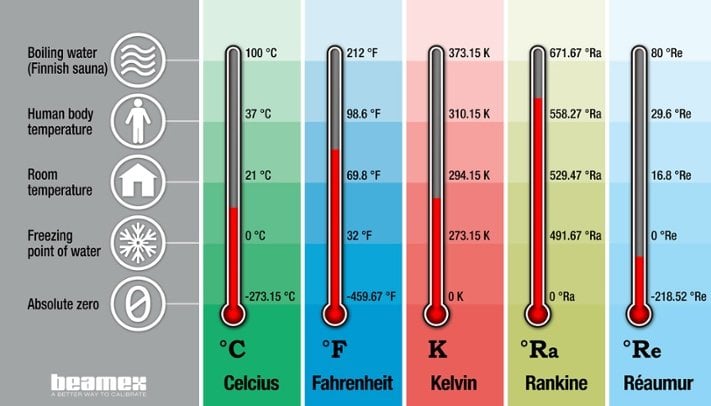
If you measure the electrical output, you will need to convert that into temperature, using international standards. In most industrial cases, you will use a measurement device that can do the conversion for you, so you can see the signal conveniently in the temperature unit (Centigrade or Fahrenheit).
What ever means you use for the measurement, make sure you know the accuracy and uncertainty of the device and ensure it has valid traceable calibration.
6 - Immersion depth
Immersion depth (how deep you insert the sensor into temperature source) is one important consideration when calibrating temperature sensors.
Our temperature calibration lab people gave this rule of thumb when using a stirred liquid bath:
- 1% accuracy - immerse 5 diameters + length of the sensing element
- 0.01% accuracy - immerse 10 diameters + length of the sensing element
- 0.0001% accuracy - immerse 15 diameters + length of the sensing element
Heat conduction in a stirred liquid bath is better than in a dry-block and the required immersion depth is smaller.
For dry-blocks, there is an Euramet recommendation that you should immerse 15 times the diameter of the sensor added with the length of the sensor element. So, if you have a 6 mm diameter sensor, which has a 40 mm element inside, you immerse it (6 mm x 15 + 40 mm) 130 mm.
Sometimes it is difficult to know how long the actual element is inside the sensor, but it should be mentioned in the sensor specifications.
Also, you should be aware of where the sensor element is located (it is not always in the very tip of the sensor).
The sensor to be calibrated and the reference sensor should be immersed into the same depth so that the middle points of the actual sensor elements are in the same depth.
Naturally with very short sensors, it is not possible to immerse them very deep. That is one reason for the high uncertainty when calibrating short sensors.
7 - Stabilization
Remember that a temperature sensor always measures its own temperature!
Temperature changes pretty slowly and you should always wait long enough to have all parts stabilized to the target temperature. When you insert the sensor into a temperature, it will always take some time before the temperature of the sensor has reached that temperature and stabilized.
Your reference sensor and the sensor to be calibrated (DUT) may have very different thermodynamic characteristics, especially if they are mechanically different.
Often one of the biggest uncertainties related to temperature calibration can be that the calibration is done too quickly.
If you most often calibrate similar kinds of sensors, it is wise to make some type tests to learn the behavior of those sensors.
8 - Temperature sensor handle
The sensor handle part, or the transition junction, typically has a limit of how hot it can be. If it is heated too hot, the sensor may be damaged. Make sure you know the specifications of the sensors you calibrate.
If you calibrate in high temperatures, it is recommended to use a temperature shield to protect the sensor handle.
9 - Calibrated temperature range
With temperature sensors, it is pretty common that you don’t calibrate the whole temperature range of the sensor.
The very top of the range is something you should be careful in calibrating. For example, a RTD sensor can drift permanently if you calibrate it in too high temperature.
Also, the coldest points of the sensor’s temperature range can be difficult/expensive to calibrate.
So, it is recommended to calibrate the temperature range that the sensor is going to be used in.
10 - Calibration points
In industrial calibration, you need to pick enough calibration points to see that the sensor is linear. Often it is enough to calibrate 3 to 5 points throughout the range.
Depending on the sensor type, you may need to take more points, if you know that the sensor may not be linear.
If you calibrate platinum sensors and you plan to calculate coefficients based of the calibration results, you will need to calibrate at suitable temperature points to be able to calculate the coefficients. The most common coefficients for the platinum sensors are the ITS-90 and Callendar van Dusen coefficients. For thermistors, Steinhart-Hart coefficients can be used.
When sensors are calibrated in an accredited laboratory, the points may also be selected based on the lab’s smallest uncertainty.
11 - Adjusting / trimming a temperature sensor
Unfortunately, most temperature sensors can not be adjusted or trimmed. So, if you find an error in calibration, you cannot adjust that. Instead you will need to use coefficients to correct the sensor’s reading.
In some cases, you can compensate the sensor error in other parts of the temperature measurement loop (in transmitter or in DCS).
Other things to consider
Documentation
As with any calibration, the temperature sensor calibration needs to be documented in a calibration certificate.
Traceability
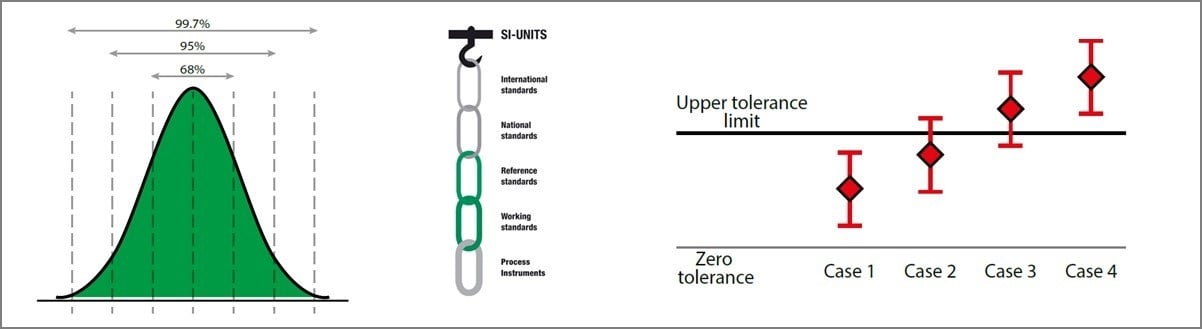
In calibration, the reference standard used, must have a valid traceability to National Standards, or equivalent. The traceability should be an unbroken chain of calibrations each having stated uncertainties.
More info on metrological traceability, please see the blog post Metrological Traceability in Calibration – Are you traceable?
Uncertainty
As always in calibration, also in temperature sensor calibration, you should be aware of the total uncertainty of the calibration process. In temperature calibration the calibration process (the way you do the calibration) can easily be by far the biggest uncertainty component in the total uncertainty.
More information on calibration uncertainty, please see the blog post Calibration uncertainty for dummies
Automating the calibration
Temperature calibration is always a pretty slow operation since temperature changes slowly and you need to wait for the stabilization. You can benefit a lot, if you can automate your temperature calibrations. The calibration will still take long time, but if it is automated, you don't need to be there to wait for it.
This will naturally save time and money for you.
Also, when automated, you can be sure that the calibration gets always done the same way.
Download free white paper
Click the picture below to download this article as a free pdf file:

Other related blogs
If you found this blog post interesting, you may also like these ones listed below. Please feel free to browse all the articles in the Beamex blog, maybe you find some interesting articles to read.
- Uncertainty components of a temperature calibration using a dry block
- Pt100 temperature sensor – useful things to know
- Thermocouple Cold (Reference) Junction Compensation
- Temperature units and temperature unit conversion
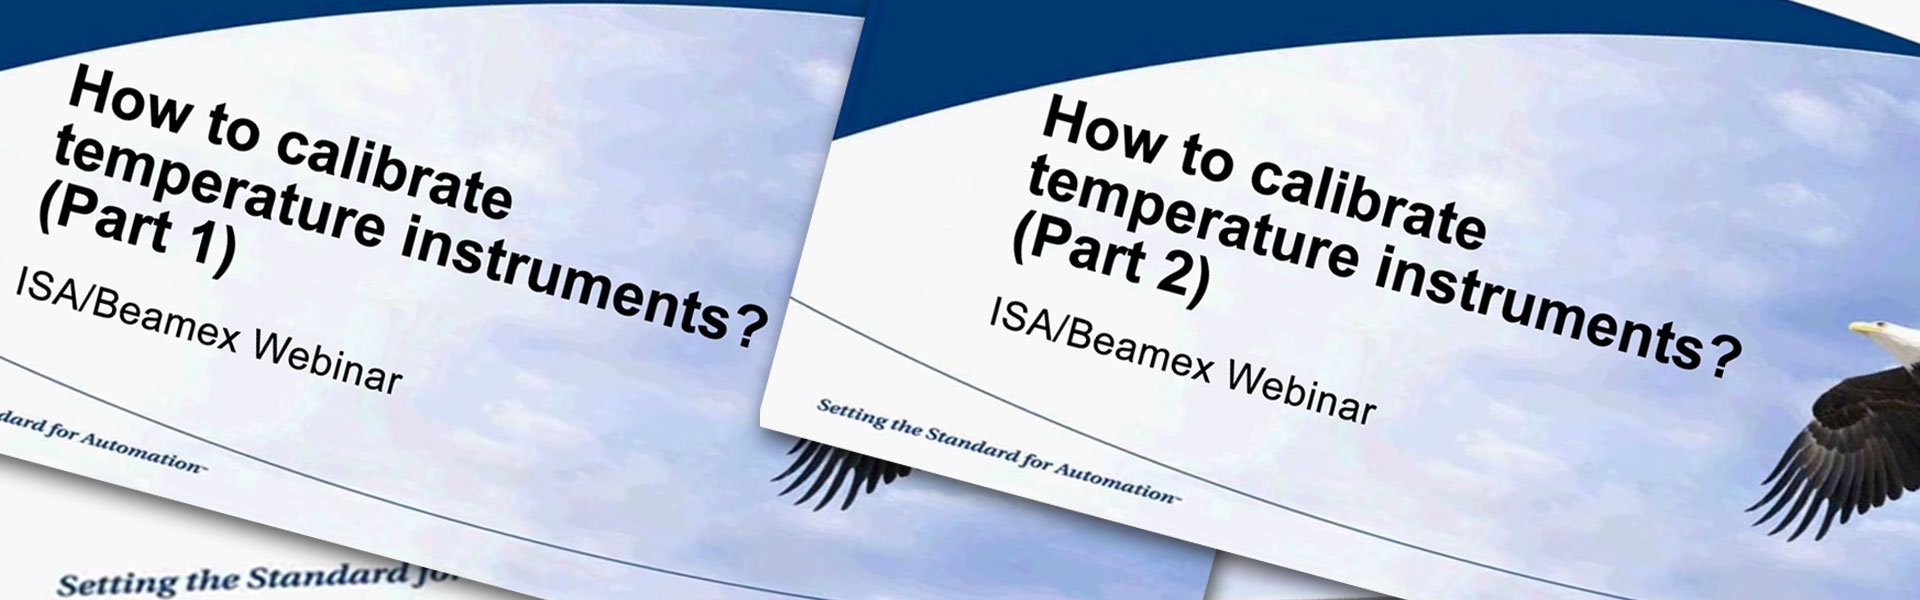
- How to calibrate temperature instruments [Webinar]
- Sanitary temperature sensor calibration
- How to calibrate a temperature switch
Beamex solutions for temperature calibration
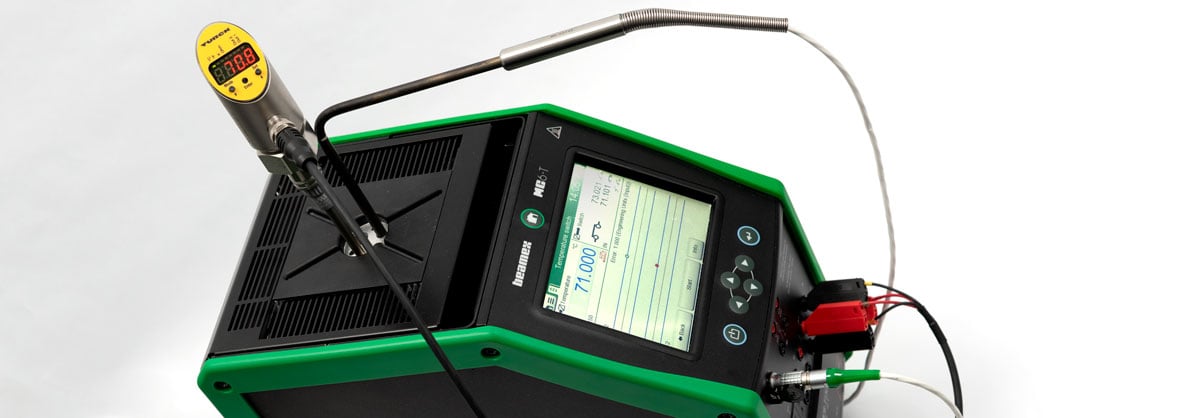
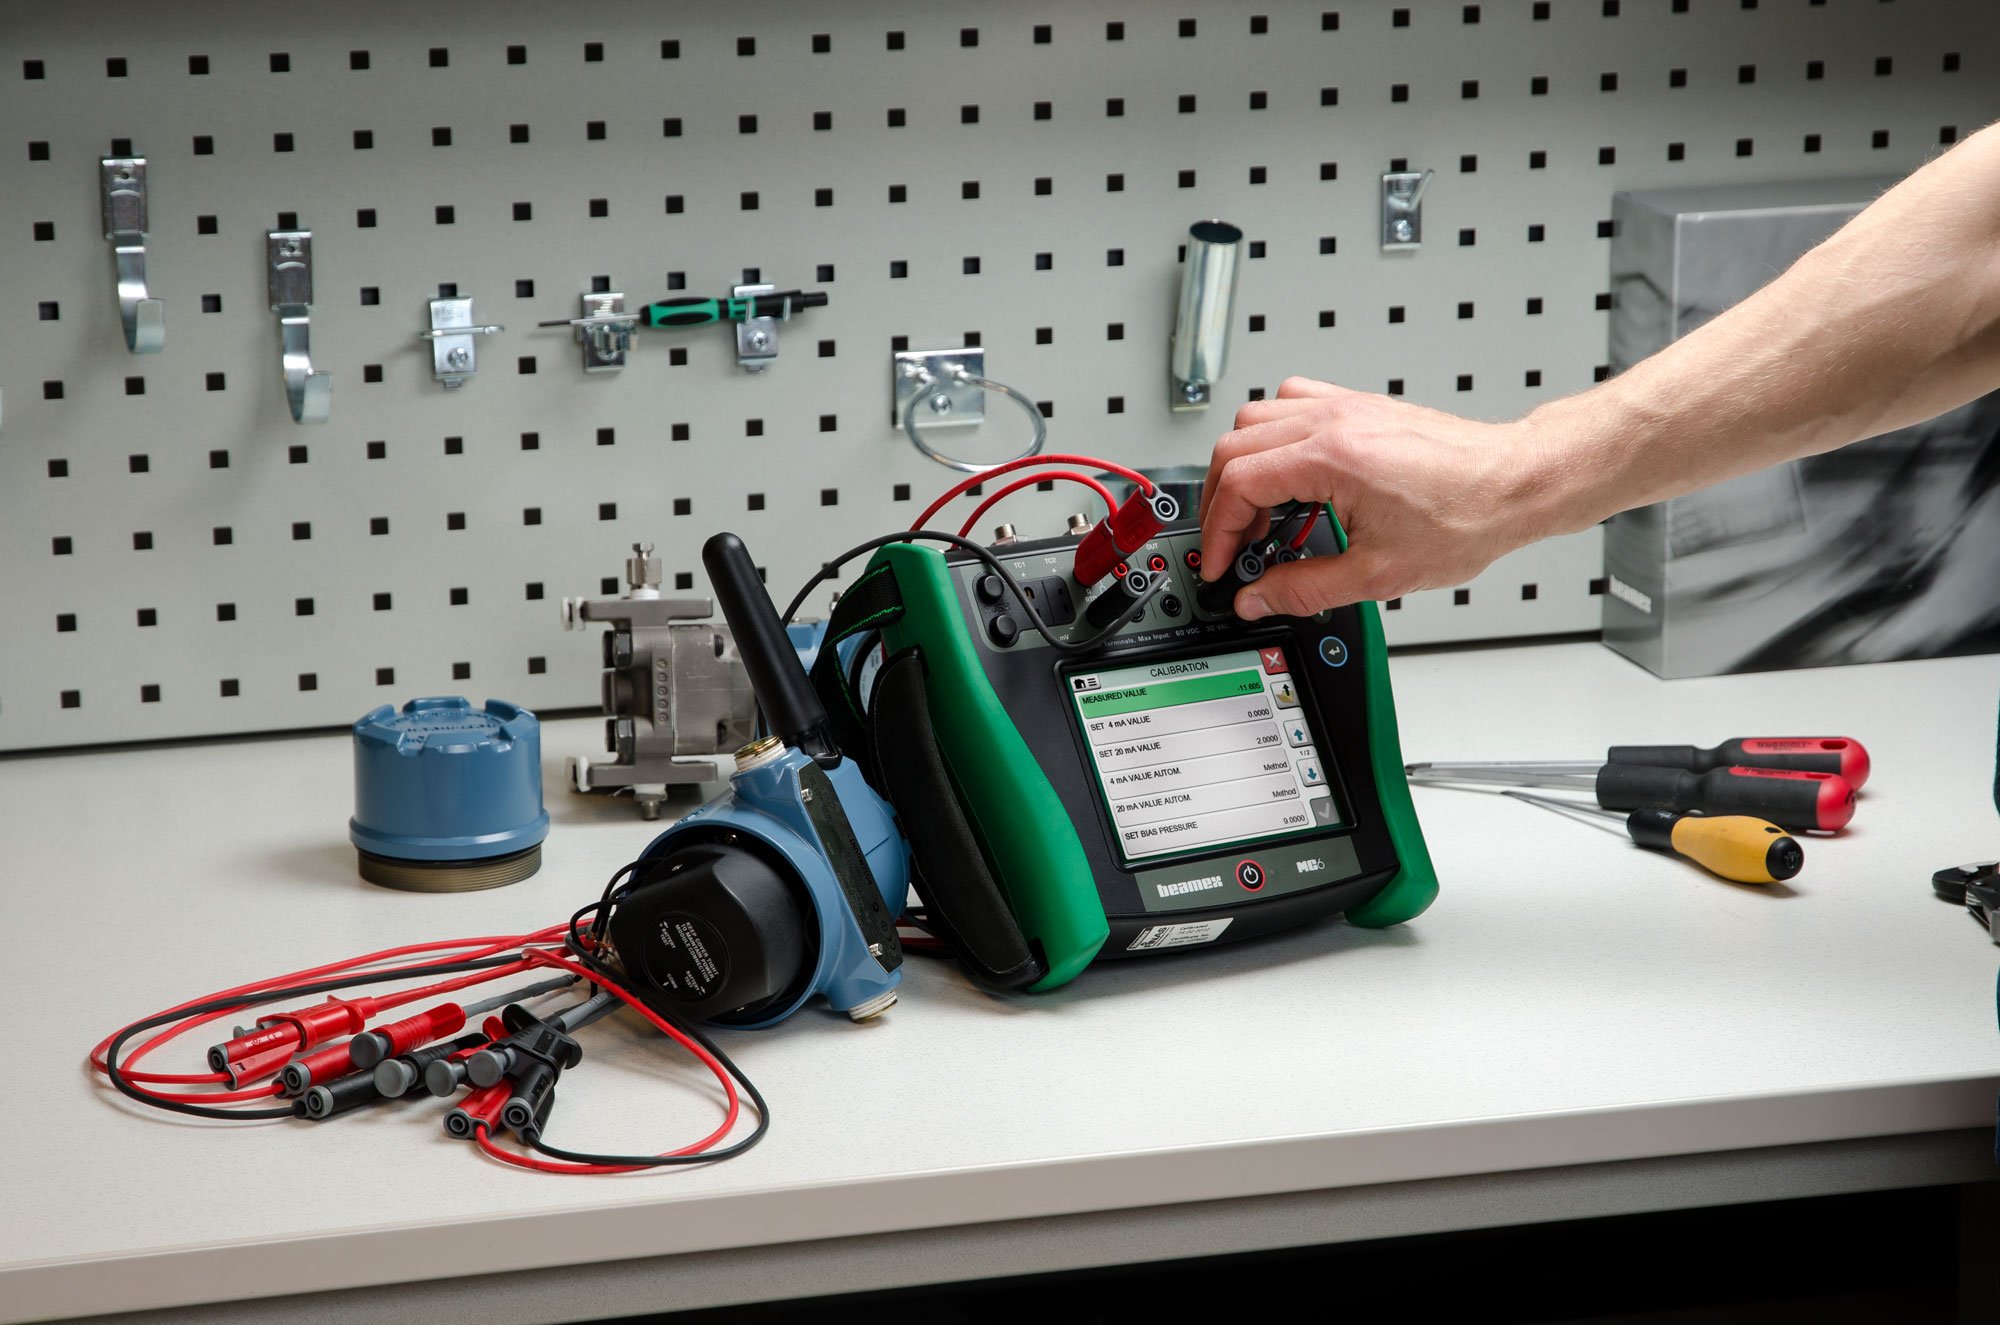
Please check out the new Beamex MC6-T temperature calibrator, that is a perfect tool for temperature sensor calibration and for much more. Click the below picture to read more:

Please check also what else Beamex can offer you for temperature calibration or for temperature calibration services.
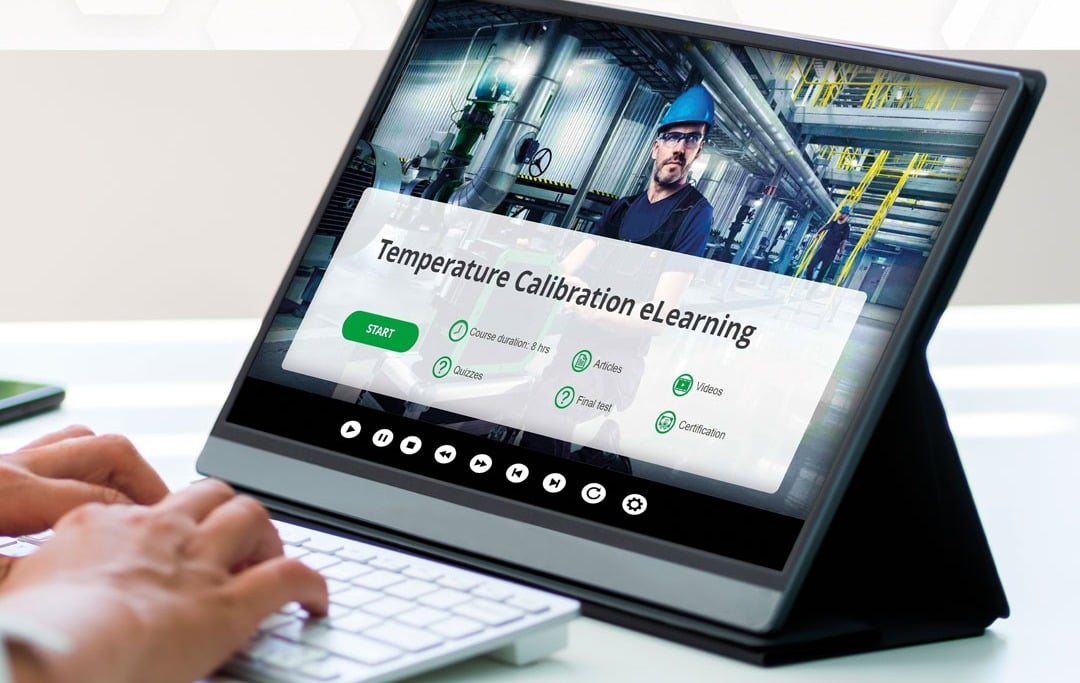
Temperature Calibration eLearning
Free eLearning course on industrial temperature calibration.
Master temperature calibration with this free comprehensive eLearning course from Beamex. Deepen your knowledge, pass the quiz, and earn your certificate!
Temperature Sensor Calculator
A free tool to easily convert between temperature and electrical signals for thermocouples and RTD sensors.
https://www.beamex.com/resources/temperature-sensor-calculator/
Thanks to our accredited temperature calibration laboratory persons for their help in making this article. Special thanks to Mr. Toni Alatalo, the head of our accredited temperature laboratory!


Discussion